Have you ever taken a picture of the moon only to be disappointed by the results? The photo of the moon may have appeared blurry, out of focus, too small, or too bright to name a few issues that may occur.
In this article, you will learn how to photograph the moon like a pro with any camera and get great results.
Moon Photography Considerations
Before setting out to take pictures of the moon, you should consider the following factors.
Cloud Cover
Of course, if the sky is completely overcast, you won’t see the moon at all. Ideal cloud cover conditions for moon photography are clear to partly cloudy. Dark Sky has a great cloud cover map that is useful for moon photographers and selenophiles alike.
Phase of the Moon
If your goal is to capture a specific moon phase (e.g. full, gibbous, quarter, crescent), you will have to wait until the moon reaches that phase. Use a moon phase calendar if you are unsure when that will be.
Moonrise and Moonset Times
Use a moonrise and moonset calculator to determine what period of time the moon will be above the horizon in your area and whether it will work for your desired photographic result. Also, keep in mind that the moon rises in the east and sets in the west, just like the sun, due to Earth’s rotation.
In addition to the planning and patience that are required for moon photography, the right equipment combined with the knowledge of how to use it is important to capture the moon successfully.
Equipment for Moon Photography
You certainly don’t need everything on this list (just a camera will do), but there are a few pieces of camera gear that will enhance your moon photos in different ways.
Camera
Obviously, you need a camera to take a picture of the moon, but it doesn’t have to be fancy. A DSLR camera is ideal due to its optimal quality and variety of settings, but you can take great pictures of the moon with other types of cameras including point-and-shoot and smartphone cameras.
It’s important, regardless of what type of camera you are using, to learn how to adjust the camera’s settings, which we will get to later.
Telephoto Lens
A telephoto lens is a lens with a longer focal length, which makes distant objects in the frame appear closer (and larger) when zooming in on them.
Using the lens to zoom is called optical zoom and helps preserve the quality of the image. Zooming in on an object digitally, like when you’re editing the image with Photoshop, for example, reduces the quality of the image.
Tripod
There are many benefits of using a tripod, but it’s especially important in low-light situations with longer exposure times.
Camera shake is when the photographer unintentionally shakes the camera while shooting. The longer the exposure, the higher the probability that camera shake will occur and cause blurry images. A tripod helps to reduce this occurrence by adding stability.
Remote Shutter Release
Even when using a tripod, it’s still possible to cause camera shake, and therefore blurriness in a photo, by the mere act of pressing the camera’s shutter button. To reduce this possibility even further, consider using a remote shutter release, which enables you to take a picture without touching the camera.
An alternative to using a remote shutter release is to use the camera’s timer. This will give you a number of seconds to remove your hands from the camera before the picture is taken.
Moon Photography Settings
Now that you know what equipment to use when taking pictures of the moon, we will go over the best settings for moon photography.
The goal when taking any photograph is to achieve your desired exposure. This means opening the aperture to a certain size and for a certain amount of time to allow enough, but not too much, light to reach the camera’s sensor and record the image. It’s important to find the right balance so that the image is not overexposed or underexposed. These issues can be corrected to a certain extent in Photoshop later, but too much and the detail is lost and not recoverable.
No situation will have the exact same circumstances, so these settings are a starting point and then you can adjust as needed.
ISO
Use the lowest possible ISO setting (usually ISO 100 or ISO 200) to retain as much detail as possible in the photograph. With a low ISO setting, and especially when it’s dark, you will need to compensate with the aperture and shutter speed to allow enough light into the lens to properly expose the photograph.
Aperture
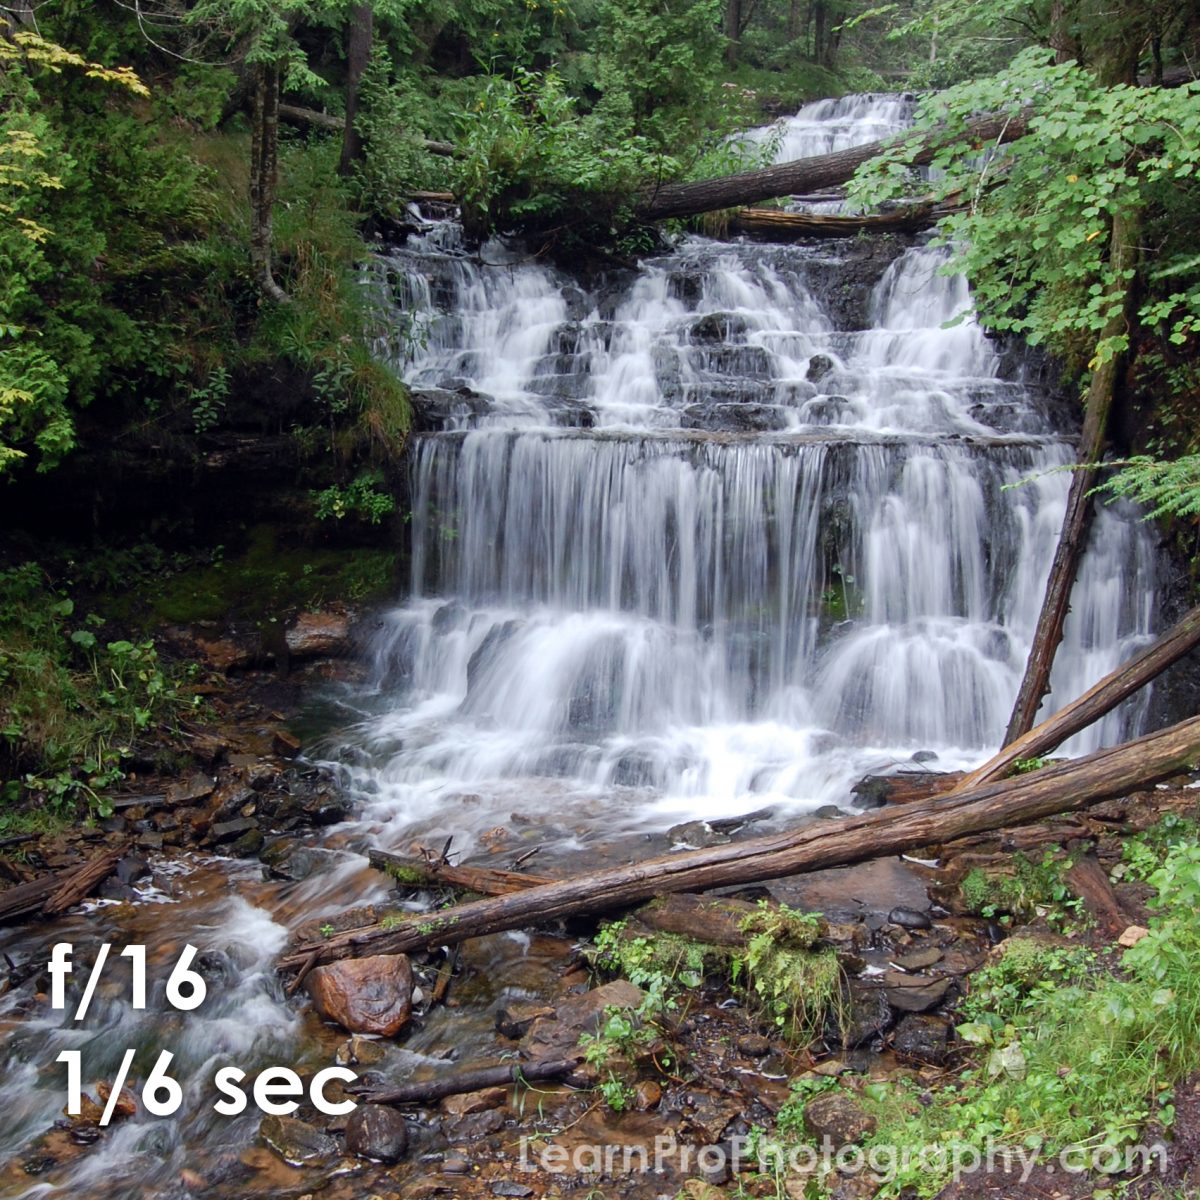
Chose a smaller aperture (higher numbers like f/11 or f/16). Smaller apertures have greater depths of field.
Shutter Speed
Here you will need to experiment until you find the optimal shutter speed for your situation. Start at 1/100 and adjust faster or slower depending on how your photo is exposed. As mentioned earlier, slower shutter speeds require a tripod, or else the photo will likely be blurry.
Composition and Exposure
When composing a photograph of the moon, you first need to decide whether you want to just shoot the moon itself or the moon with surrounding objects and/or landscape.
The Moon Itself
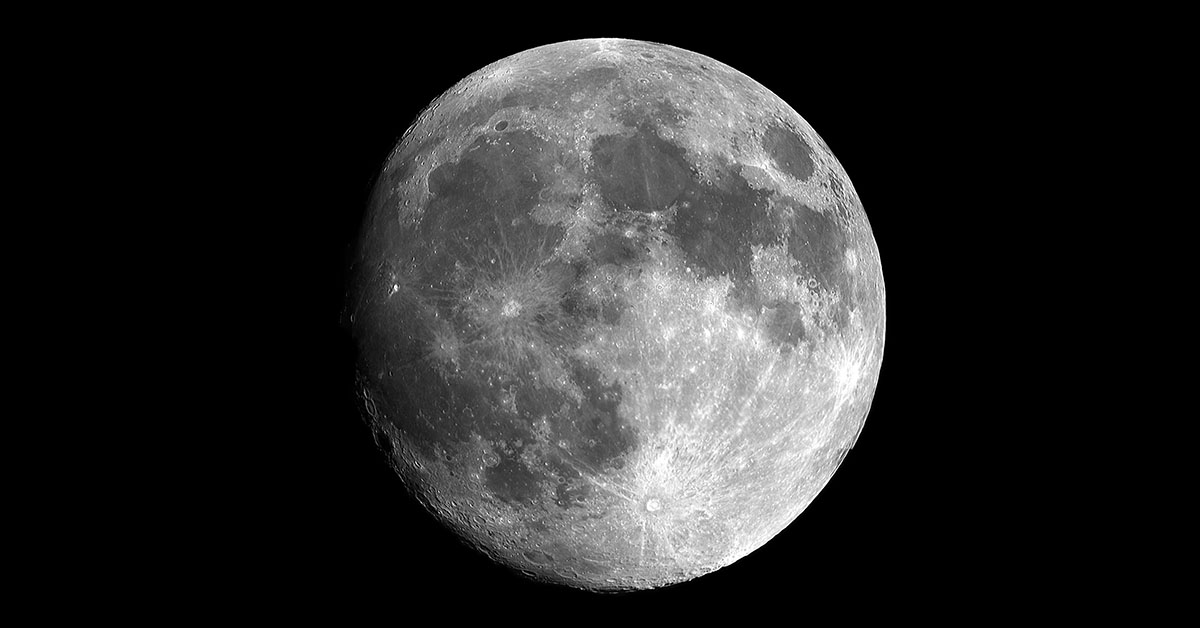
If your goal is to capture the detailed surface of the moon, you will want to zoom in quite a bit. For this, you will need a telephoto lens to fill the frame with the moon as much as possible so that you can avoid cropping later. A tripod is usually necessary for longer lenses because they have a greater chance of causing blurry photos due to camera shake.
The Moon with Objects and/or Landscape
In pictures in which the moon is the main focus, it is better to underexpose the foreground than to overexpose the moon. Use your camera’s spot metering setting to expose for the moon. Also, consider bracketing if you are not sure of the best combination of settings.
Just after sunset and when the moon is close to the area of the horizon that the sun has set are excellent conditions for landscape shots that include the moon. The sky and landscape are still somewhat illuminated by the sun and the moon is visible near the horizon.